
Restoration of a Swedish made Dux mono tube radio.
Includes rebuilding a power supply can capacitor, making a stereo to mono interconnect and recreating a radio logo with thermoplastic and putty.

Nordic made tube radios are beautiful. Solid simplicity and elegance. Photo above from completed restoration.
This little radio (it is relatively small) was bought in an auction for about 20 euro. The seller said it worked, so I plugged it in and tested it, yes it worked, but not a good idea to run it like this – it made a sound like the transformer was struggling och surely it will need service anyway due to it’s age. My plan is to use it as a music source with an external source to the gramophone input.
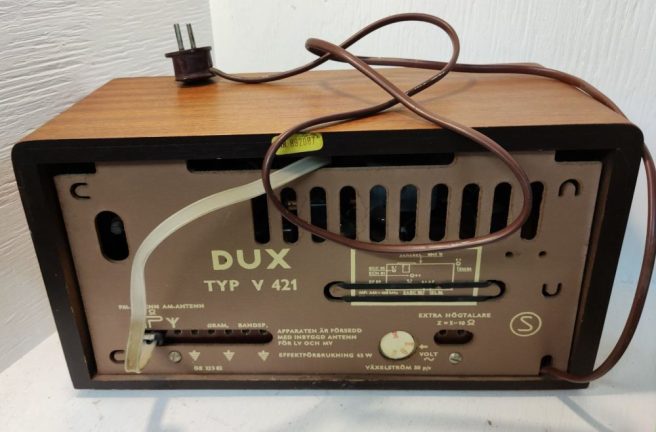
Photos below from the auction. Very elegant little radio.

Upon inspection I found that resistor R35 has overheated and measuring the filter capacitor one section (of three) is almost shorted.

R35 was replaced.

Next, the filter capacitors. Wanted to try to “restuff” it like the pros do.
So I drilled the contents out. Cleaned it. Created a “platform” at the bottom from PCB, put in the four caps that it originally contained. A bit of a challenge to get them in there.


It worked.
Also made the contraption to be able to rotate and turn over the unit without breaking stuff. Thanks to M Caldeira with the Youtube channel Electronics Old and New, higly recommended: https://www.youtube.com/channel/UC1czABA87SroDeBAqsk1TDA

Replaced another electrolytic and a wax capacitor. Cleaned the chassis.

On testing it the rectifier died.

New rectifier with NOS 300 ohm dropping resistor. And a new fuse. Had to be a bit creative.
Would have preferred to have the fuse before the transformer but could not find a suitable place for it. It had no fuse at all, oddly.

It works! Triumph. It looks a little dangerous, maybe, but it’ll be ok.
I don’t have much experience with tube radios actually. Watched many hours of restorations though from channels like Electronics Old and New, D-Lab, Mr Radio, David Tipton, Mr Carlsons lab and others.

Next was to DIY a stereo to mono plug with banana plugs for the gramophone input. This input is just an aux in, you can use a normal line level source like a DAC or streamer or CD. There is no RIAA stage.
The recipe is to not just couple left and right together but to use two resistors of say 1k Ohm (there are some different recipes) on each channel and tie them together after the resistor. I used a female 5-pin DIN plug in the other end because I use a lot of DIN plugs on my vintage equipment and have DIY’ed a few of those. You can use any type you want, banana to RCA..


“AUX og TAPE” is for normal sources like a DAC if you make your own cable. Left side on drawing is source in if you make a normal interconnect (from tape recorder / “avspilling”), right side is from amp to taperecorder (from receiver to record on tape deck / “opptak”).


It got a new, used but working EM84 magic eye.

You may have noticed that it had no Dux logo on the front. I had to make one. Thanks to David Tipton who used Oyumaru to recreate a logo in a video, very clever!
Highly recommended channel if you like tube radios. This is the video where he explains how to use this plastic putty to mold a Kriesler logo – https://www.youtube.com/watch?v=8bTW-4taNKE
I have another Dux radio with a logo that will serve as original, model V 401.


Oyumaru is a plastic paste (thermoplastic) that you soften in hot water then use to make a mold. David Tipton in the video above used some sort of two component stuff, I chose instead Milliput putty. Oyumaru hardens relatively quickly. Milliput hardens in three hours or so.


Then painted the Milliput. First a layer of spray primer. Tried different methods to get the right gold and brown colours. To spray paint the whole logo in gold and then handpaint the brown parts. To mask the brown parts, paint with gold and then handpaint the brown parts. The full gold logo actually looks nice but I decided to go for the original design. Had to paint brown (model builder type of solvent based paint) in two layers. Also gold spray in two layers.
After that a clear lacquer from Liquitex in two layers.

How to attach it? Considered some options like double sided tape and superglue, but decided on the classic Swedish glue Karlssons Klister. It is flexible and does not dry superfast which helps if the logo needs to be adjusted.
The Milliput form bends a bit at the edges, it isn’t completely flat, but managed to get it to sit quite well on the front. It’s fragile and one of the edges broke off, but it could be repaired with cyanoacrylate glue so I didn’t have to make a new logo.
Not too shabby for a first time?
This was a great fun project. It took about 40 hours excluding research (and uploading this).
Thanks for reading this far.
